
Use the terminal (Mac) and command prompt (Windows) to build the environment. Please refer to the following site for each activation method.
Terminal (Mac)
Tutorial
Command prompt (Windows)
Tutorial
On a Mac, we will use a package management system called Homebrew in the following environment construction procedure.
Homebrew Install using the instruction from official website.
To use Homebrew, you need to install Command Line Tools for Xcode.
When you execute the following command from the terminal, the installation confirmation dialog is displayed.
Click the install button.
xcode-select --install
Install it by running the following command:
/usr/bin/ruby -e "$(curl -fsSL https://raw.githubusercontent.com/Homebrew/install/master/install)"
Run the following command.
brew --version
If you see the following, you’re okay.
(Latest version 2020-09-06: 2.4.16)
Homebrew 2.4.16
Homebrew/homebrew-core (git revision 7ec07; last commit 2020-09-06)
Homebrew/homebrew-cask (git revision f373b; last commit 2020-09-06)
If the version is old, update it with the following command.
brew update
Scala runs on the Java platform (Java Virtual Machine), so a JVM must be installed. Also, use Amazon Corretto 8 on Mac and Windows as the JDK to use.
Download “amazon-corretto-preview2-8u192-macosx-x64.pkg” from the following site.
https://docs.aws.amazon.com/ja_jp/corretto/latest/corretto-8-ug/downloads-list.html
Double-click the downloaded pkg file and install it according to the installation procedure.
Config the following settings in .bash_profile, .zshrc, etc.
export JAVA_HOME=/Library/Java/JavaVirtualMachines/amazon-corretto-8.jdk/Contents/Home
export PATH=$JAVA_HOME/bin:$PATH
*The path set in JAVA_HOME can be obtained from this command.
/usr/libexec/java_home
Execute the following command in CLI terminal.
java -version
If you see the following, you are successful.
(Latest version as of January 8, 2019: 1.8.0_192)
openjdk version "1.8.0_192"
OpenJDK Runtime Environment (build 1.8.0_192-amazon-corretto-preview2-b12)
OpenJDK 64-Bit Server VM (build 25.192-b12, mixed mode)IntelliJ is an integrated development environment that supports multiple languages such as Java.
It is also the base of Android Studio, which is famous as an Android development environment.
Click “DOWNLOAD” for the Community edition from this site to download the .dmg file.
Download

Click “DOWNLOAD” for Community edition from this site to download the .exe file.
Download
Click “DOWNLOAD” for the Community edition from this site to download the .tar.gz file.
Download
Open the .dmg package and drag and drop IntelliJ IDEA into your application folder
Launch the .exe file and follow the installation wizard
Extract the .tar.gz file and run bin / idea.sh.
./idea.sh
Start IntelliJ.
The following dialog will be displayed. Select [Do not import …] and click [OK].

Check [I confirm …] and click [Continue].

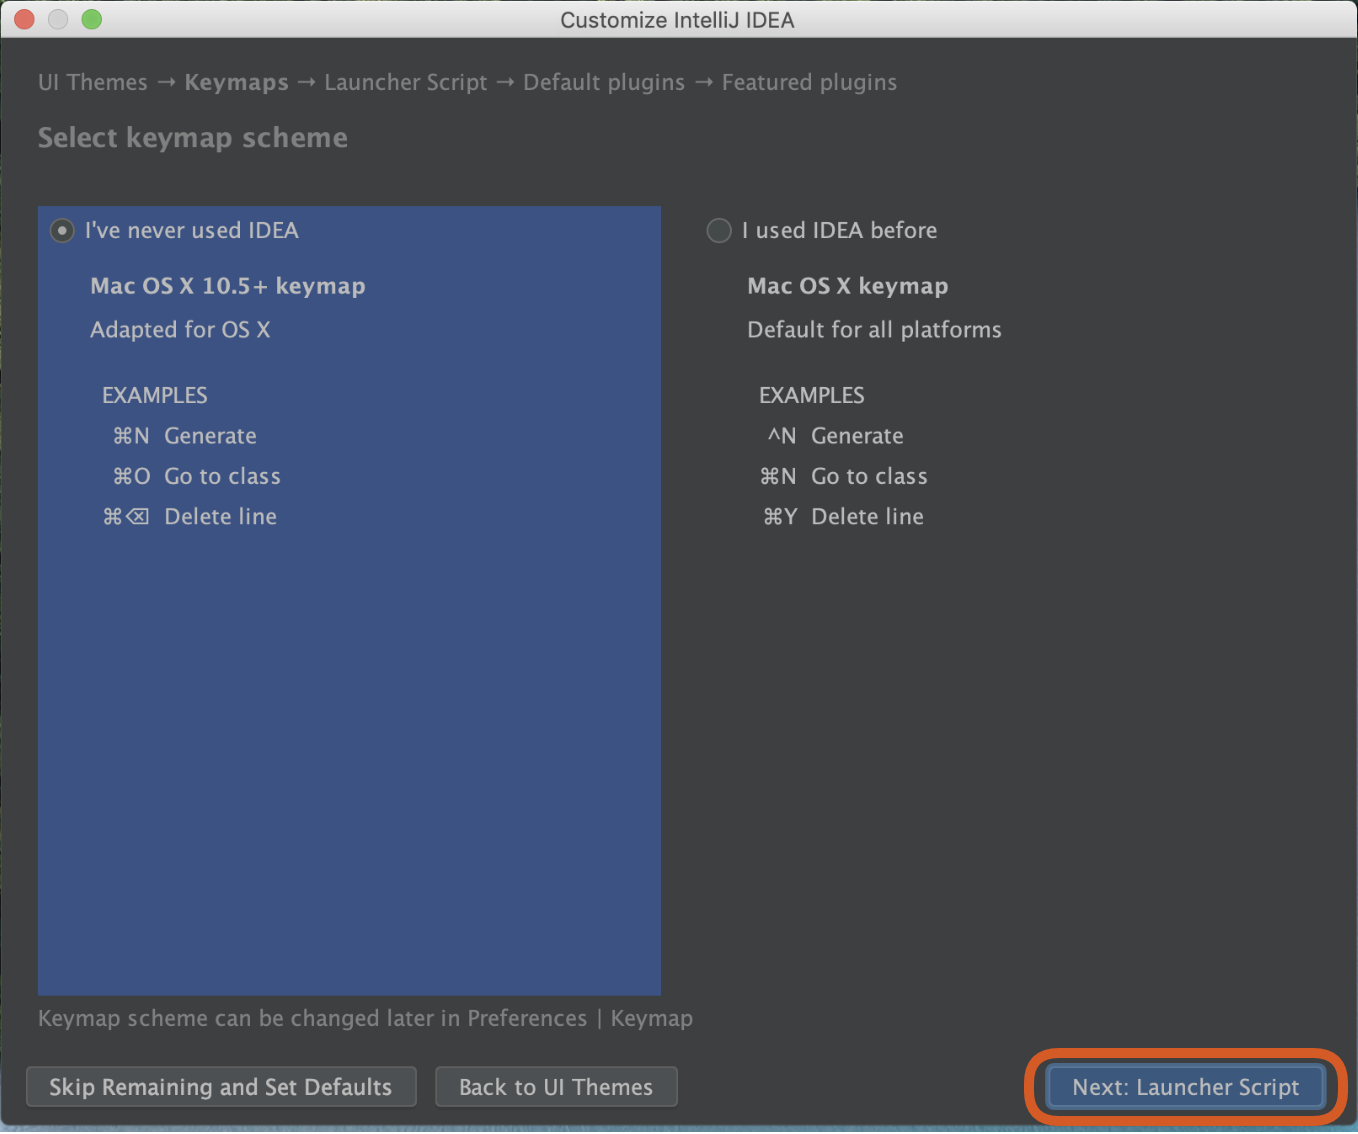
The following screen will appear Select your favorite design and click
[Next: Keymaps]

Click [Next: Launcher Script]
Click [Next: Default plugins]

Click [Next: Featured plugins]

Click Install in Scala to install the Scala plugin. Finally, click [Start using Intellij IDEA] to complete.

sbt is a build tool for Scala.
You will need it to create and build Playframework projects.
brew install sbt
Download [sbt-1.2.8.msi] from the following site and double-click to install it.
Follow the steps on this site to install.
Change to the appropriate directory where you want to place the project files.
cd
sbt new playframework/play-scala-seed.g8

This template generates a Play Scala project

name [play-scala-seed]:
Enter “sample-play-scala” here.
Then continue with default
This template generates a Play Scala project

name [play-scala-seed]: sample-play-scala
organization [com.example]:

Template applied in ./sample-play-scala
On Windows, you may get the following error, but you can safely ignore it.
[error] java.io.IOException: Unable to delete file: \AppData\Local\Temp\giter8-86279809762767\src\main\g8\.gitignore
[error] Use 'last' for the full log.
It’s okay if the directory where you executed the command has a “sample-play-scala” directory.


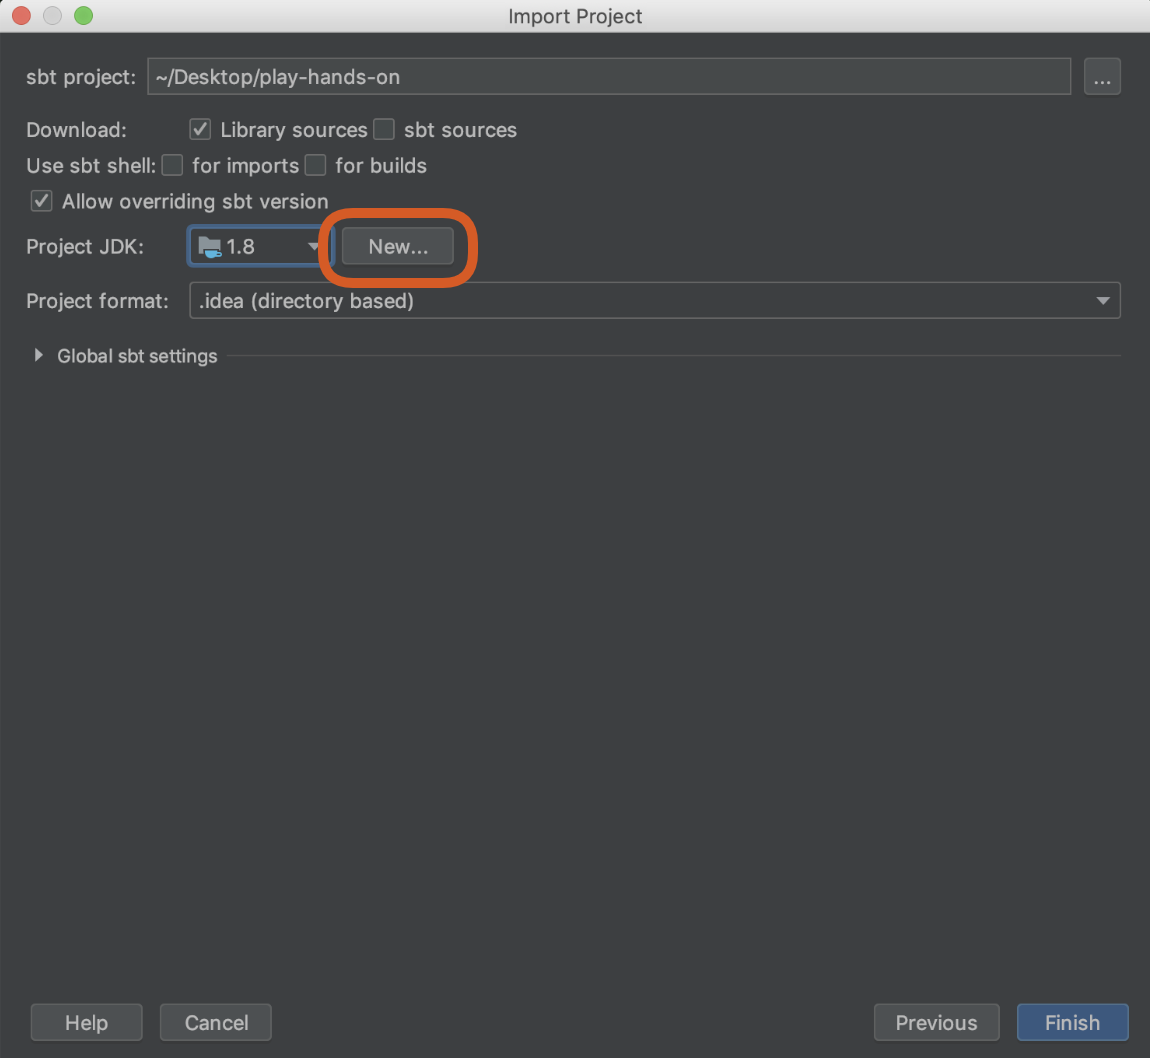
Click the [New …] button in the [Project JDK]

Mac
/Library/Java/JavaVirtualMachines/amazon-corretto-8.jdk/Contents/Home
Windows
C:\Program Files\Amazon Corretto\jdk1.8.0_192
Linux
/usr/lib/jvm/java-8-openjdk-amd64
Make sure the scaffolding project working by showing up “Welcome to Play!” in browser after run below command in project dir
cd sample-play-scala
sbt run
Source
https://github.com/ddnb/sample-play-scala/releases/tag/v1.0.0
